Pages

Friday, June 24, 2011

Extreme Card Makeover Part 2

In yesterday's post, I did an extreme card makeover and asked for suggestions for a fourth version. If you haven't checked it out already, head there first and this post will make more sense. :)

Remember these?


The two tips I got were to put the soccer ball on dimensional adhesive and to put a border of black around the whole card. Here is the newest version. I know that you can't tell there's dimensional adhesive under the soccer ball in this photo, but it's there and it does make a difference in person. :)

What are your thoughts? Do we need a version #5? I've got enough paper to make about 12 more of these now that I have the design nailed down. :)


This has been a fun process and I've enjoyed making over my card. I encourage you to do the same, especially if you think a card didn't come out as well as you would have liked. Thanks to Kate, Pat, and Sarah for taking the time to leave me comments. :)

Thursday, June 23, 2011

Extreme Card Makeover

Inspired by Sandy's weekly segment on OWHtv, I did an Extreme Card Makeover of my own today. I had picked up some sheets of soccer ball and grass PP by Paper Pizzaz a few weeks ago and knew they'd make excellent non-girly cards.

Then I made a card. I wonder why I even grabbed the adhesive on this one. There is no focal point, the pieces don't quite "go" together. In short, far from my best work.


The second card is getting somewhere. I changed colors for the sentiment, used the shadow, and put a layer behind the soccer balls. This card is OK, pulled together even, but not exciting.


The third card is the best I made. I decided the Sizzix lettering was half of the problem, so I grabbed some stamps instead. I stamped onto the green, so I ended up keeping the green/black sentiment combo but swapped out which color would be the background. It's also hard to read text that's vertical as the first two cards were, so I went back to horizontal and added an exclamation point for emphasis. I matted the sentiment on black to mimic the mat behind the soccer balls. And then I remembered one of the reasons I got the paper- it is so easy to punch out one ball for an accent. I did that, grabbed another black mat, and glued it down. This is a card I'm happy with.


Here are all three versions together for comparison's sake. Do you have any suggestions for version 4 of this card? I have plenty more paper and I'll be thrilled to post a newer version based on your suggestions!

Halloween mojo

Someone should stop me! I have a serious addiction to making Halloween cards. I already have 20 done and we're 4 months out. I know I'm attracted to the colors, orange and green being two of my favorite colors to use on cards, so that's one reason I can't get away from these cards. I also have some super embellishments I picked up months ago that I've been dying to use.

One set of cards I made used up 5 sheets of Halloween paper that I know I bought in 2002 or 2003. I never did any 8.5x11 scrapbooks and I was done trick or treating by that time, so I can't imagine why I thought I'd need it. I managed to turn it into 10 cards. I used the top of the paper to line the inside of the card. I thought it would be a shame to waste the top but because of its border I thought it would be hard to use elsewhere. I think it turned out well.


I loved this spider ribbon the instant I saw it, so I had to get it on a card. My stash didn't include any spider web paper, so I made my own with a straightedge and pen. I finished the card off with a stamp from Inkadinkado's dollar collection from JoAnn's. I love that this card is so clearly Halloween but doesn't include any orange! I'll definitely be making more of these.


My last Halloween card to share today is a paper pieced pumpkin. I took randomly sized (but around 1/2") strips of orange paper and adhered them to card stock. I used a nestie to cut out an oval. I used a leaf die cut and hand cut a stem. Rick rack mimics the vine. I finished it off with a chipboard bookplate I inked to match the green in the background. This is a great way to use scraps. If you wanted to make it look more like a pumpkin or don't have an oval die, you could print a pumpkin or oval off your computer on regular paper and glue the strips on the wrong side. Hold it up to the light to make sure you've covered everything. Then cut along the line of your print-out.

Sweet

I found some more felt embellishments at JoAnn's last week. I have a few left, but here are the cards I've got so far. I used a coupon, so these ice cream cones were under 5 cents each! It feels great to make a cute card for very little. The "sweet" stamp is from a $2 Inkadinkado set found at Big Lots. By the way, can you tell how much I love my nesties? I'm so glad I indulged and let myself by the ovals sets to start.


Flip flop!

What better way to ring in the beginning of summer than to create some flip-flop cards! These cute embellishments were part of the $2 Big Lots grab bags I mentioned in a previous post. They actually have foam soles!!! Paired with my nesties and a new aloha stamp from Hampton Arts (also $2 at Big Lots), I was able to make a dozen of these cuties, two of each design shown below. My favorite is the yellow and green color combo.


I've been busy!

About a year and a half ago, Big Lots had some scrapbooking grab bags with about 10 Colorbok products for just $2. I snatched a bunch of them, mostly for the die cut post-it pads which I love using at work. The packs came with blank cards, vellum tags, chipboard embellishments, cardstock stickers, epoxy stickers, acrylic stickers, 12x12 papers, and other stuff. I made an effort in the past couple of days to start using up some of these items. Here are some of the results.


I also recently picked up a set of 8 chipboard words and definitions for a quarter at Big Lots. At 3 cents a piece, they make good focal points for cards. I am not a fan of coloring, so I am starting to look for things that I can use other than stamped, colored images. These cards also used some blank cards like I mentioned above and scrap paper. The patterned paper is from 2007, so it's time to use it up.


Wednesday, June 15, 2011

A school-themed card on the first day of summer


Here's my submission for the OWH midweek throwdown. I couldn't believe the theme was "back to school" on my first day of summer!!!

I used one sticker from a 25-cent pack I got at Big Lots of all school-themed border stickers. I used some Colorbok letters and scrap papers from my recent clean out. I think the pattern is some very old DCWV.
Publish Post

A polar bear in many forms


I wouldn't call this "an extreme card makeover," as Sandy often does on OWHtv. I would call this instead "a series of attempts at making a card." None are exactly as I wanted them to be, but all are OK. I'm trying to figure out how to amp them up.

School's out for summer!

Today is my first day of summer break. :) It's going to be the busiest summer I've had in recent memory because I'm involved with four different trainings/internships/academies this summer as well as writing the curriculum for the new course I'll be teaching next year.

Despite all the work and an at-home to-do list that's 17 items long, I'm making three goals for OWH. First, I plan to make 100 Christmas cards by the end of the summer (and I already have 9 done). Second, I want to fill a large flat-rate box which I estimate is about 400 cards. Thus far, it's probably 15% full. Finally, I plan to host my second OWH card party. It might not happen until just after school starts since so many people travel, but at a minimum I will have the date selected and kits prepared before I go back to work.

Last night, I decided to tackle my scrap bin. It was piled about 4 inches high and I've come to realize that I don't use my scraps because I don't know what is in the bin. (I also have so many sheets of paper, it's not like I really need the scraps!) Do you know a great way to organize scraps? I'd love to hear it! I grabbed some file folders and separated the scraps into colors. While separating, I found bits that went together and was able to make about 10 cards just out of the scrap bin. There's material for a lot more cards in there as well. It feels good to make a card out of what could otherwise be trash, especially when it turns out very nice. I used a new technique I'm going to call "paper ribbon" on two cards. I love the texture it brings without lots of thickness! It's a great way to take lesser-quality paper and make it beautiful. :)

Here are some of my latest creations. The weather is gorgeous here, so I went outside to take my pictures!

Hippo by Cuttlebug, sentiment from Studio G, patterned paper by me.


Patterned paper by DCWV Animal Crackers and Pebbles, sentiment from Studio G.
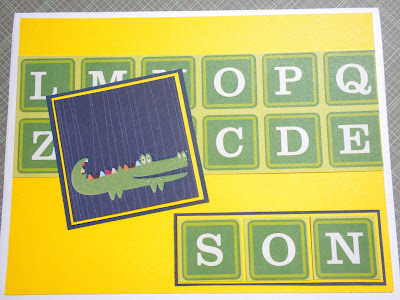

Patterned paper from DCWV Spring and Animal Crackers stacks.
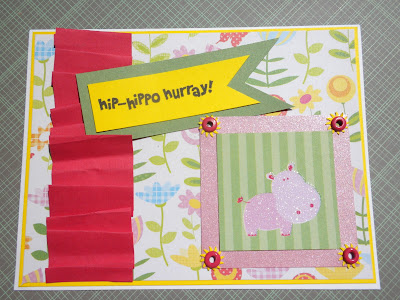


Patterned paper from DCWV Spring and Animal Crackers stacks, sentiment from Studio G, eyelets from American Crafts. This is my paper ribbon.


Turtle by Cuttlebug, patterened paper unknown, sentiment from Studio G, ribbon from American Crafts.


Embossing folder by Cuttlebug, stamp by Studio G.


Stamp by Inkadinkado, embossing folder by Cuttlebug.
Patterned paper by DCWV Spring Stack, brad by Making Memories Whimsy collection.